Network Metadata for CX
Field Trial Instructions
This guide will walk through the steps of starting a free 30-day field trial for Prilink’s Network Metadata for CX (NMCX), available from Genesys AppFoundry.
Step by Step Instructions:
- Installing the NMCX Premium App from AppFoundry
- Setting up the PrilinkNM Desktop App
- Setting up the Agent Windows Desktop
1. Installing the NMCX Premium App from AppFoundry
To be able to add a Premium Client Application in your Genesys Cloud org, make sure that you have the Billing > Subscription > Add permission assigned to your Role.
The following are the steps to install the Network Metadata for CX (NMCX) Premium App:
-
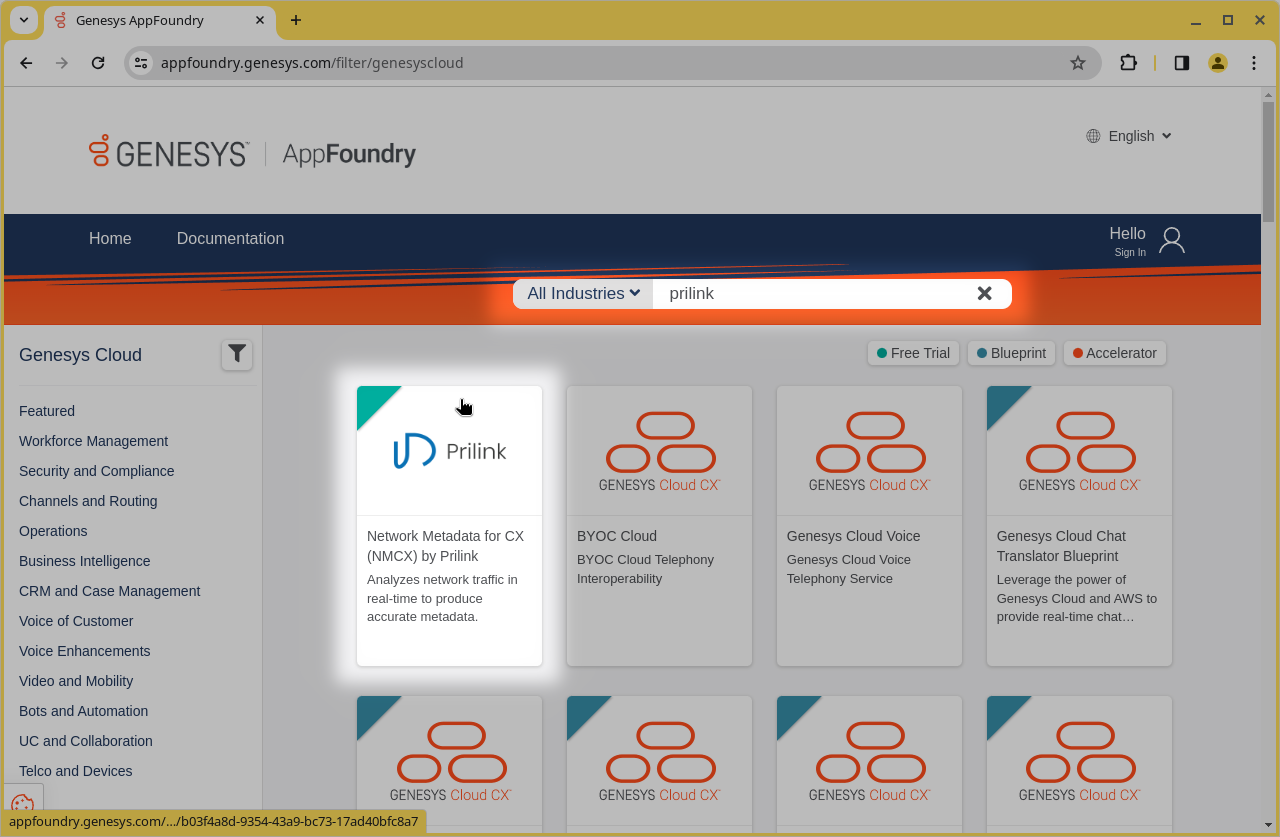
Go to the AppFoundry site and sign in. On the search bar, type
prilink and choose the Network Metadata for CX card.
-
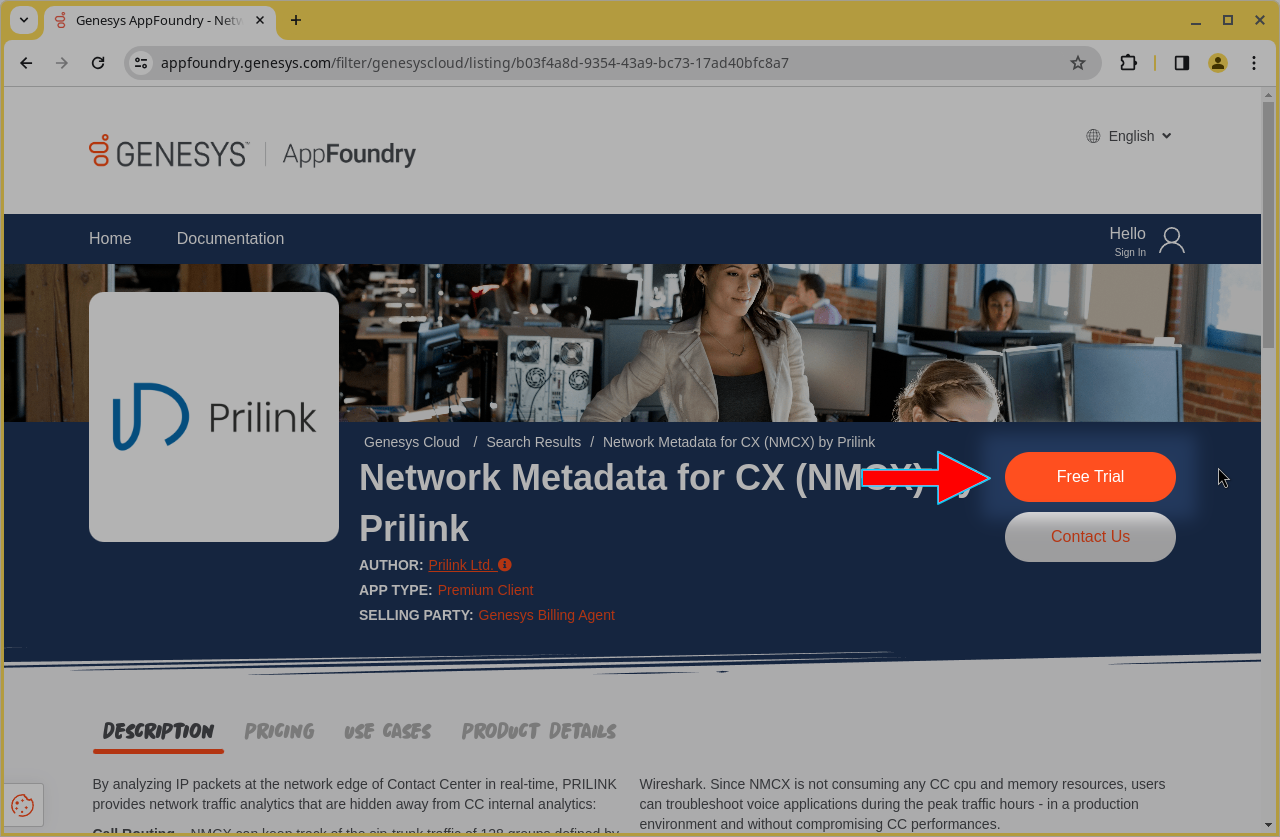
On the NMCX product page, click the Free Trial button and follow on-screen
instructions.
-
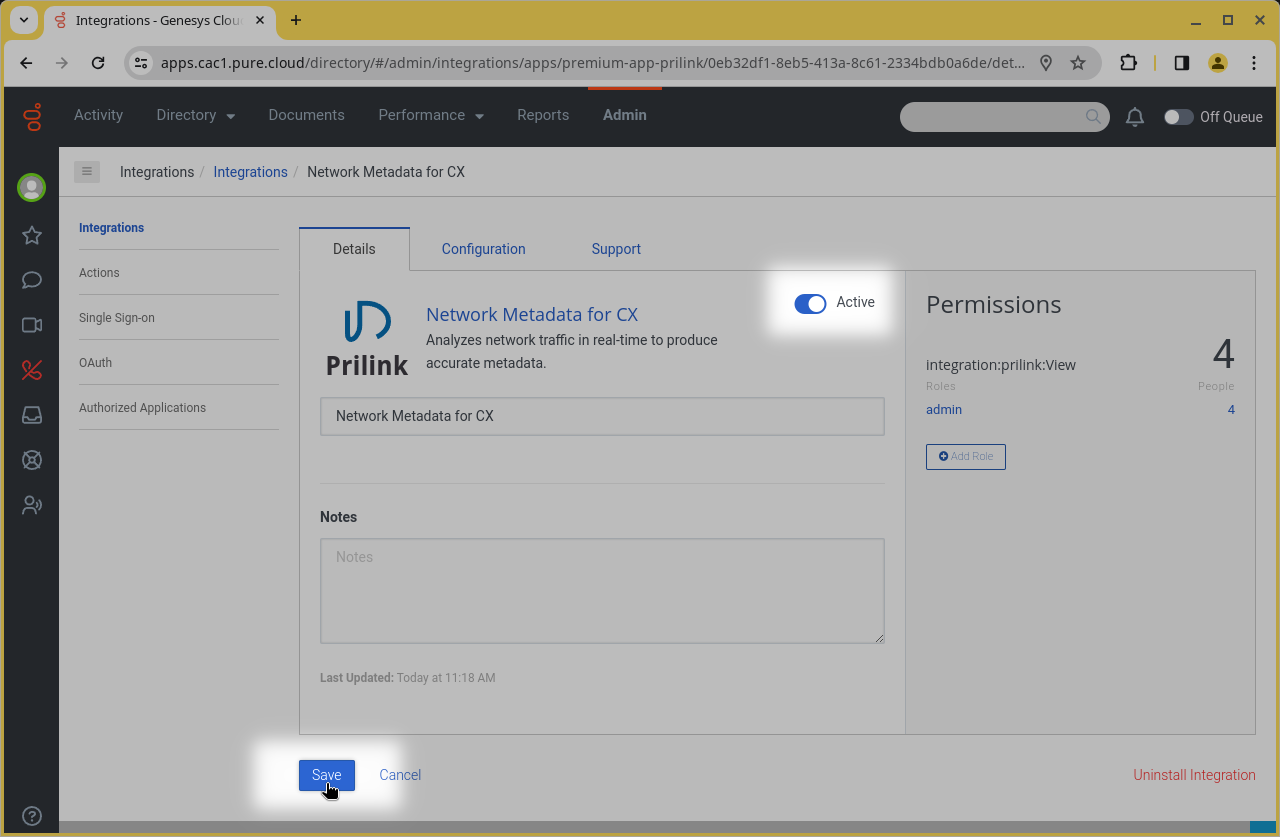
Once the NMCX App has been added to your Genesys Cloud organization, you must activate
the App. Toggle the Status to Active and Save. Logout and Log back in, or
reload the browser page for the new activated integration to be recognized.
-
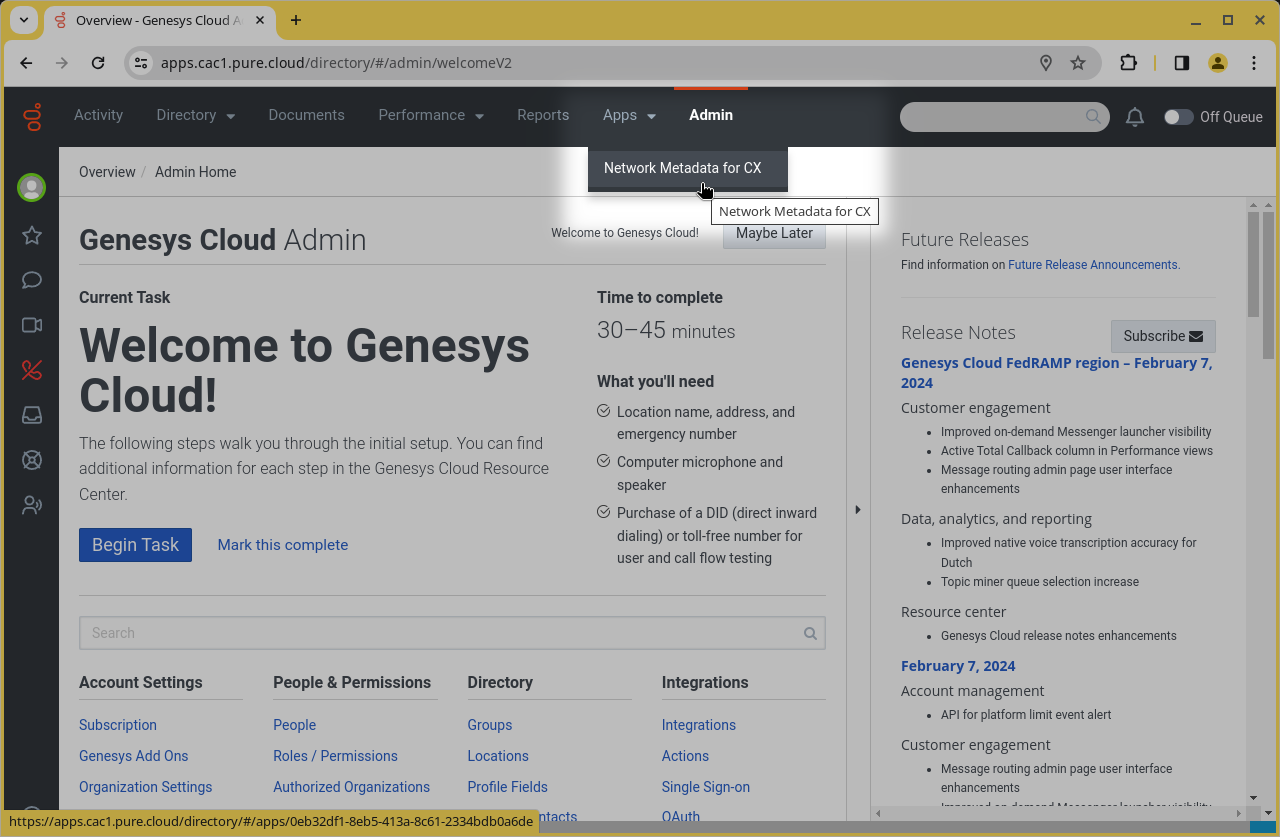
You should now be able to see the Network Metadata for CX entry in the
Apps
menu of your Genesys Desktop.
-
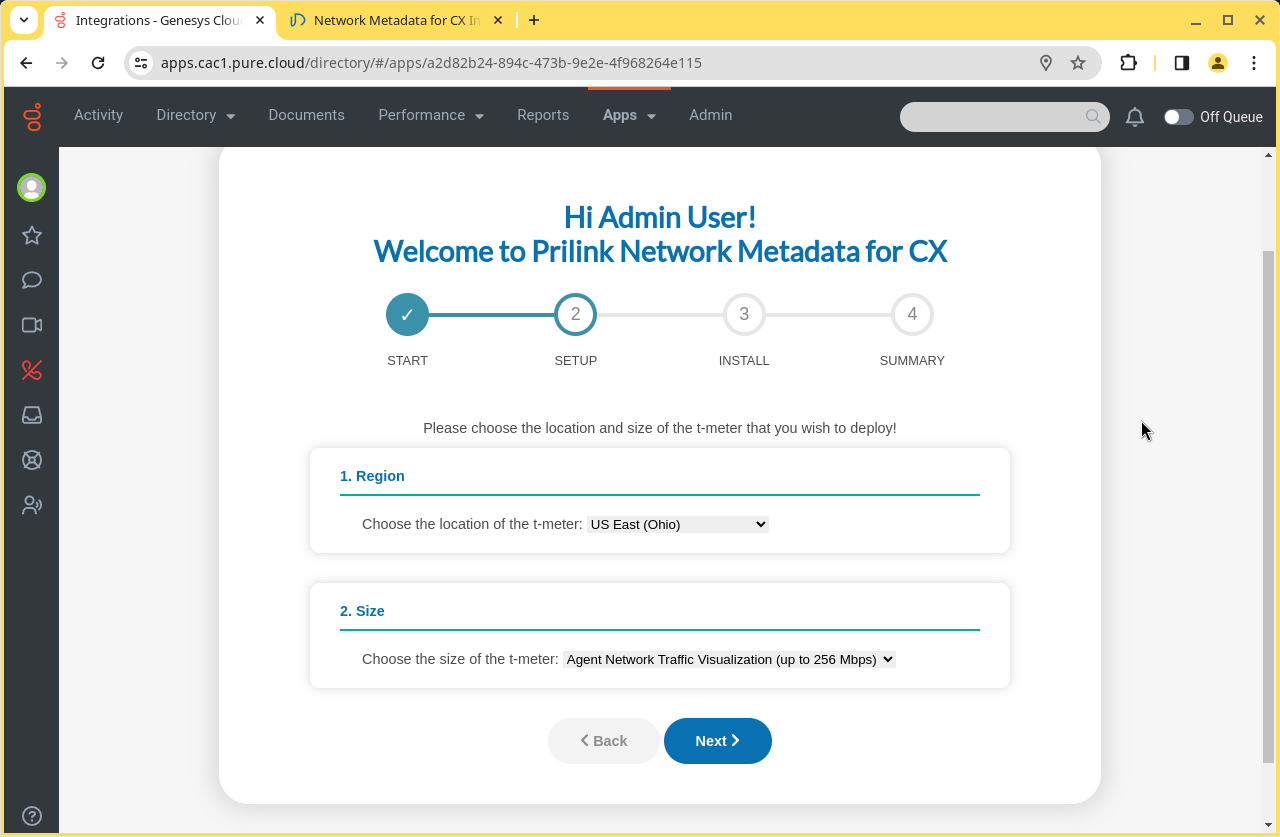
Choose Network Metadata for CX from the Apps menu to launch the
installation wizard and follow on-screen instructions. Choose the region of the first t-meter that
you wish to deploy. Additional t-meters can be deployed at a later date. For t-meter size, choose
Agent Network Traffic Visualization, as this is the only option available for free trials.
-
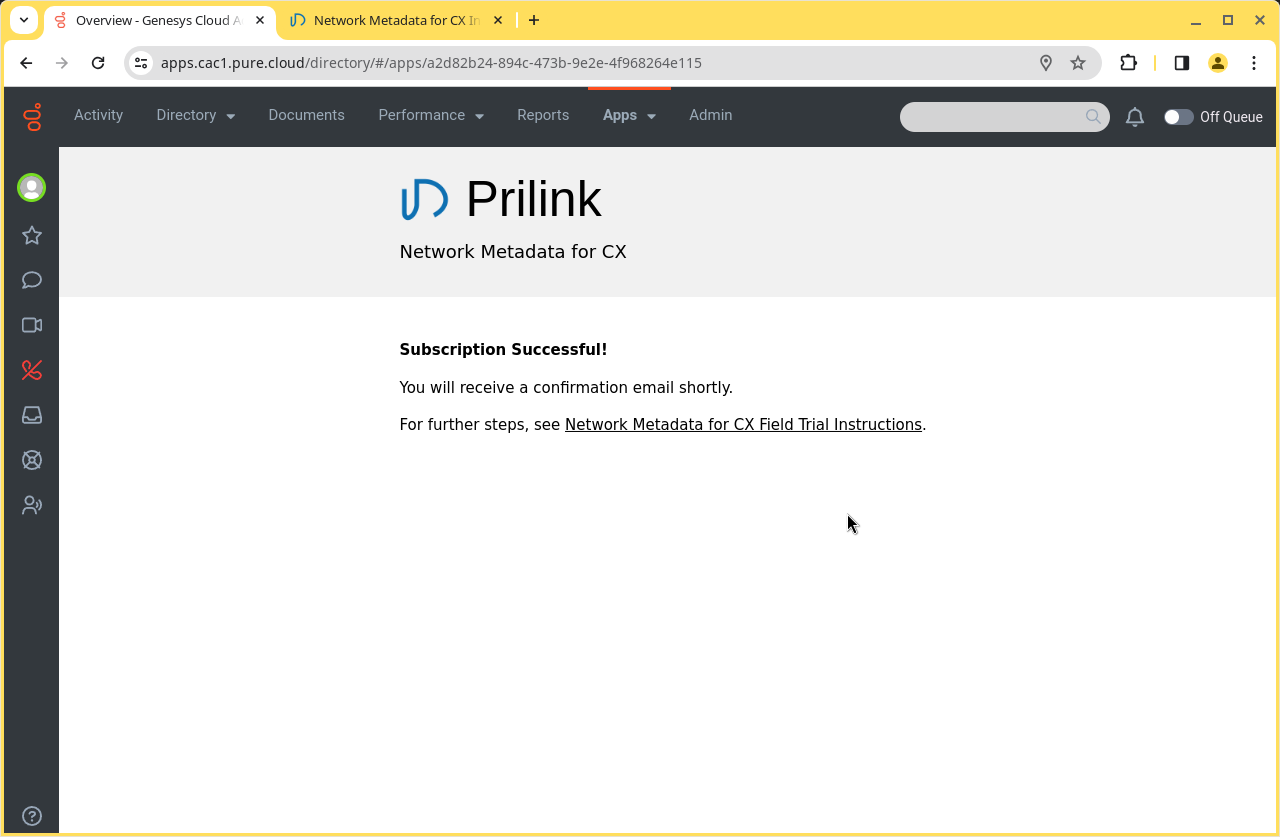
Once installation is complete, the wizard will now redirect you to an information page containing
instructions for next steps. You will also receive a confirmation email, which will contain information
needed to connect to your first t-meter in the next step.
2. Setting up the PrilinkNM Desktop App
Use the PrilinkNM application to access your trial t-meter. PrilinkNM is available as an AMI from AWS markteplace, or you can download the PrilinkNM installer and install on any Windows PC or Server.
-
Choose one of the 2 options below for installing the PrilinkNM App:
- Launch an EC2 instance using the PrilinkNM AMI from AWS marketplace (PrilinkNM app is pre-installed)
- Download the PrilinkNM installer, and run on any Windows PC or Server.
-
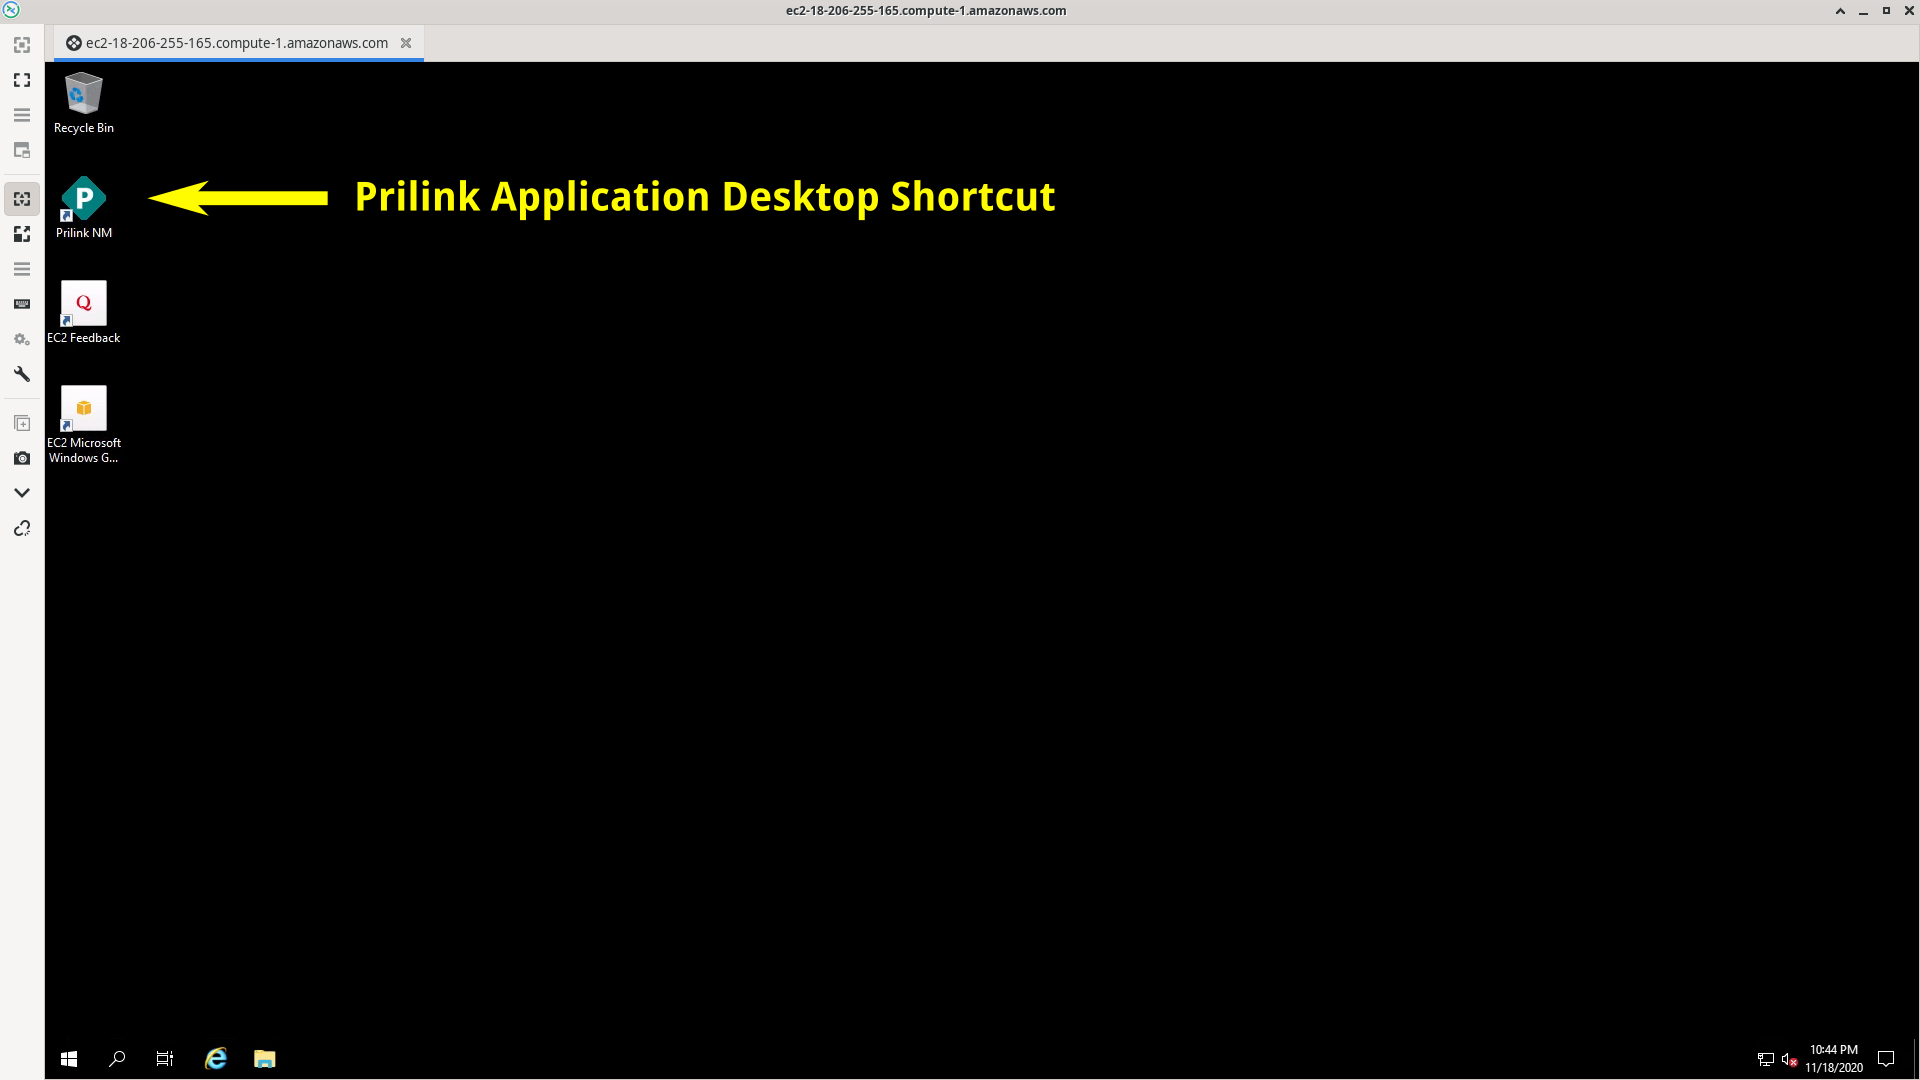
Once PrilinkNM is intalled, click the PrilinkNM icon on the desktop to start the application.
- Enter your Genesys Cloud org ID and Transaction ID. These values can be found in the confirmation email that you received after installing the NMCX AppFoundry Premium App.
-
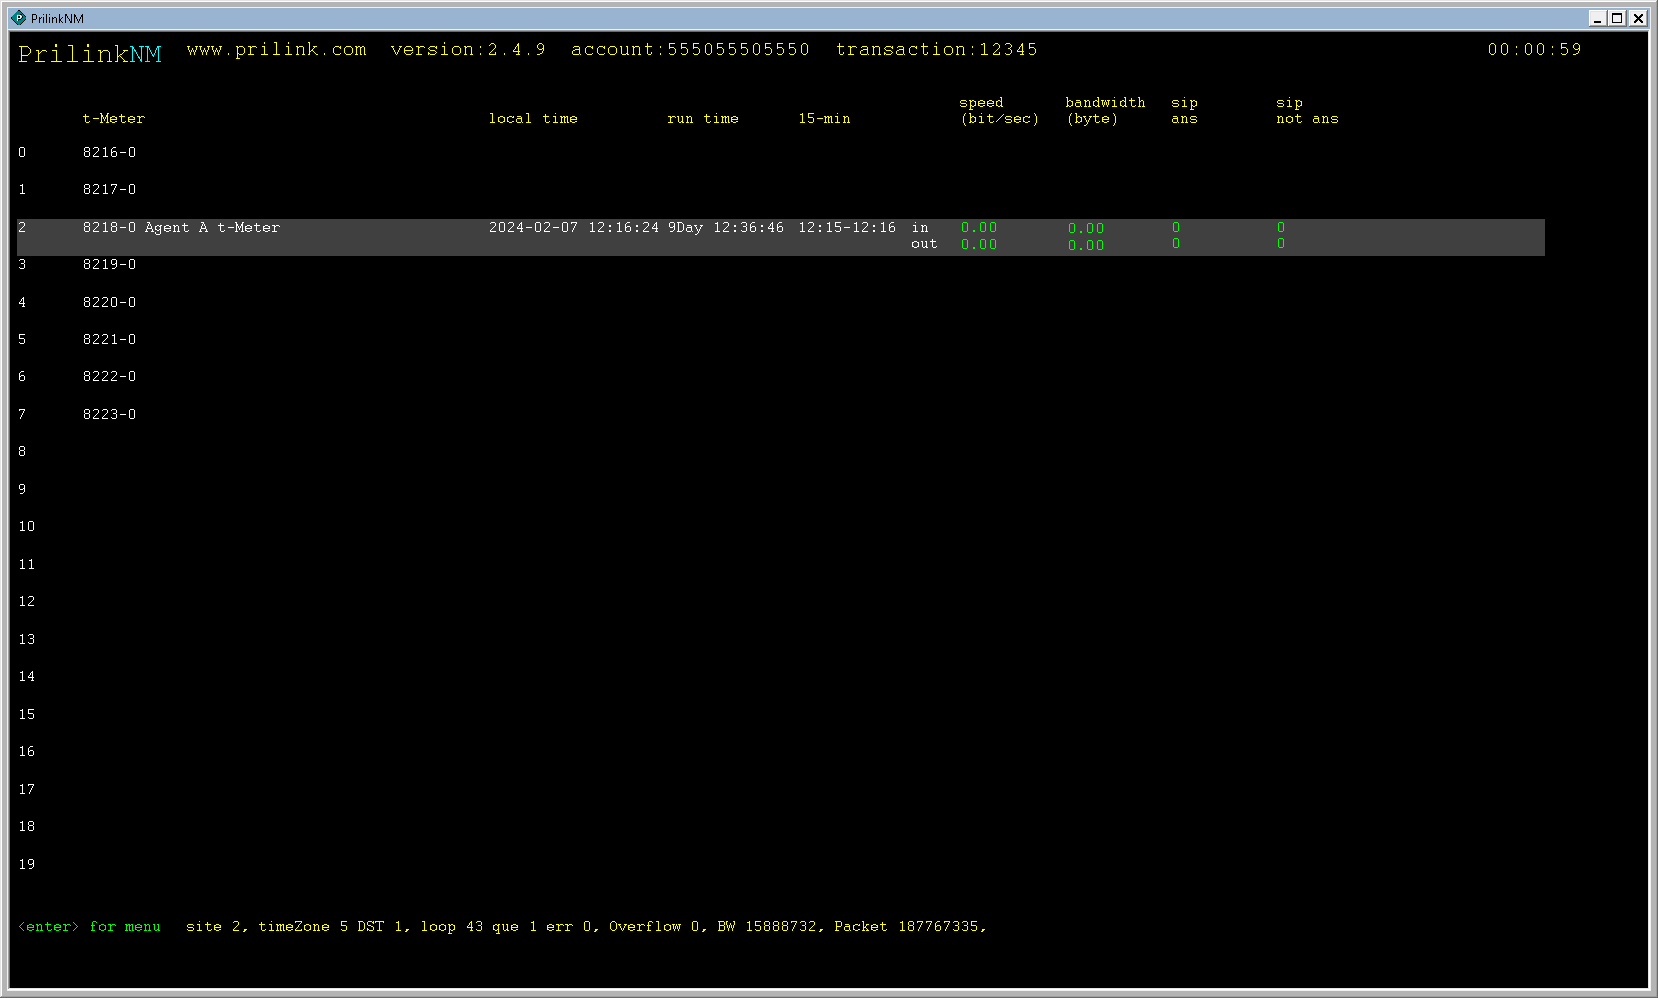
The PrilinkNM app will automatically connect to your trial t-meter, and connection status is shown on the
main screen. You should see local time and run time incrementing. Data
fields (speed / bandwidth, etc.) will be 0, because you are not yet forwarding any traffic to the t-meter.
-
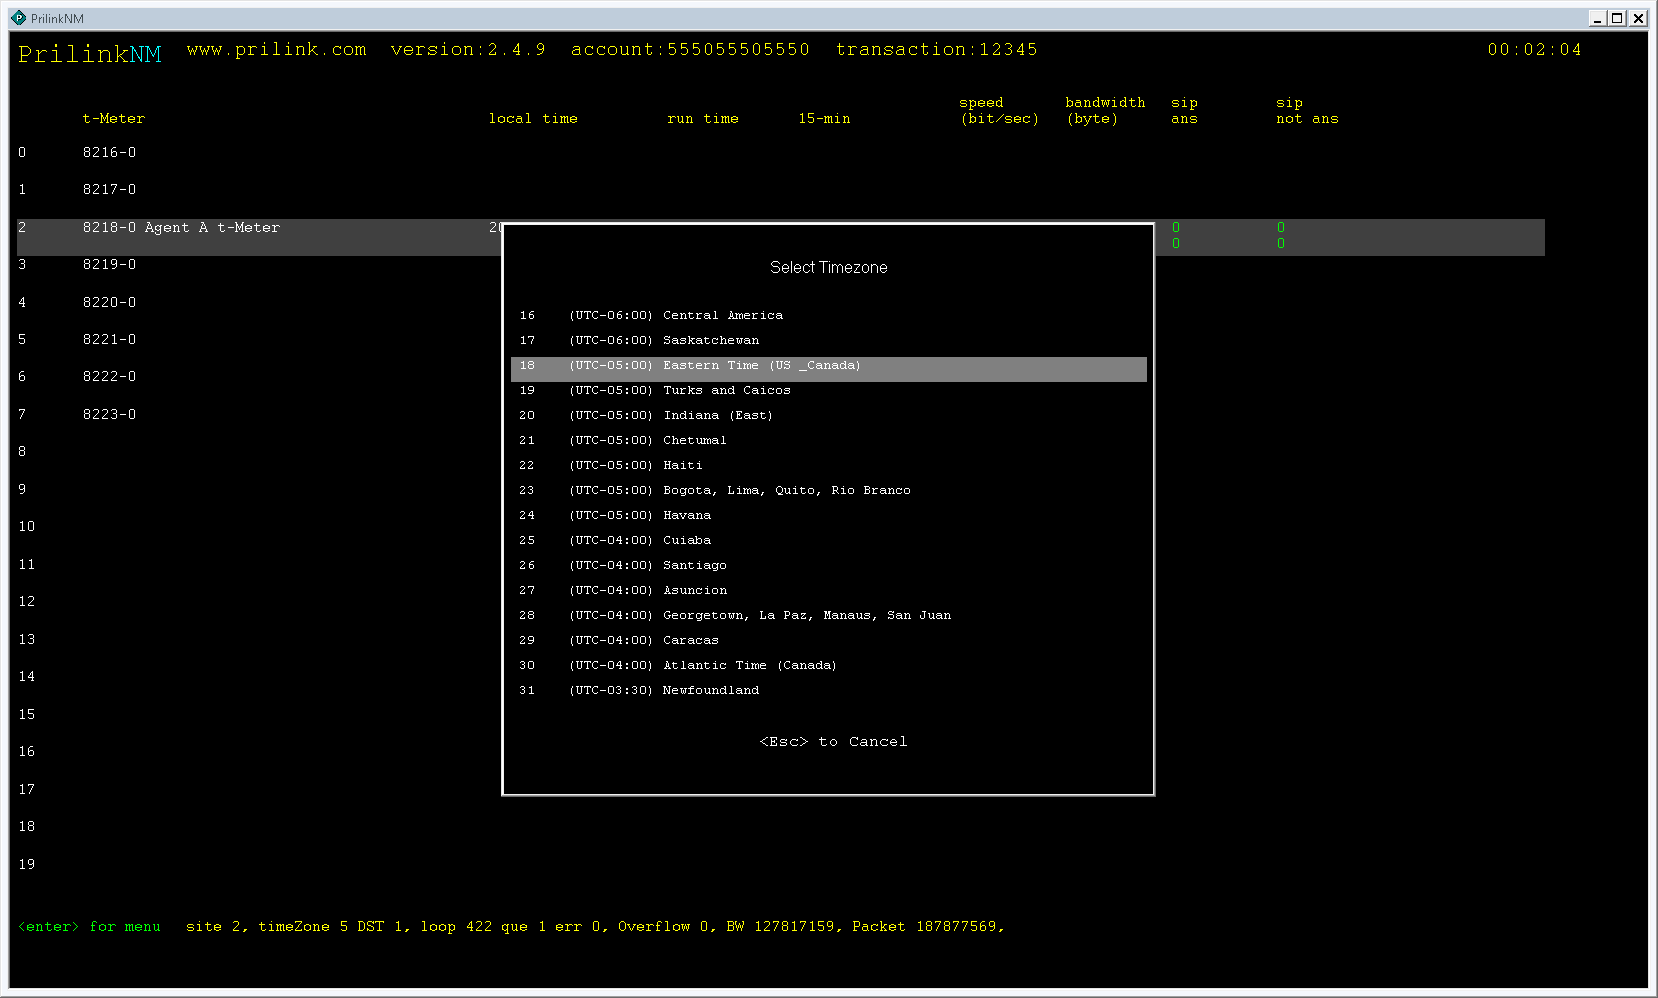
Use arrows keys to highlight your t-meter, hit Enter, and choose Site Name / Timezone -> Edit Timezone. Enter the
timezone of the agent traffic source that you intend to forward to this meter.
3. Setting up the Agent Windows Desktop
Now that a trial t-meter has been deployed and you are able to access it through the PrilinkNM app, the next step is to begin forwarding agent traffic to the t-meter for analysis. The following steps should be completed on the Agent’s Windows Desktop.
- Follow the instructions to Configure traffic mirroring with a Hyper-V vSwitch.
- Download AgentTraffic.iso, a Debian-11 based ISO prepared by Prilink.
- Follow the instructions to Create Virtual Machine with Hyper-V, using the agentTraffic.iso downloaded above.
-
Launch the agentTraffic VM is and connect to it using an SSH client. Run the vxlan-script and pass it the
public IP address of the t-meter as an argument. (The
public IP address is found in the confirmation email that you received after installing the NMCX Premium App, and can also be seen in the PrilinkNM main
screen).
  Debian GNU/Linux comes with ABSOLUTELY NO WARRANTY, to the extent
  permitted by applicable law.
  admin@ip-x-x-x-x:~$ sudo ./vxlan-setup.sh 203.0.113.14
  Setting up VXLAN: remote IP 203.0.113.14
  VXLAN setup complete. Reboot.
  admin@ip-x-x-x-x:~$ sudo reboot
After reboot, VXLAN collector setup is complete.
Any network traffic on the agent desktop network interface will now be forwarded through a VXLAN tunnel to the specified t-meter for analysis. Check the PrilinkNM main screen to verify that data fields (speed / bandwidth) are incrementing.